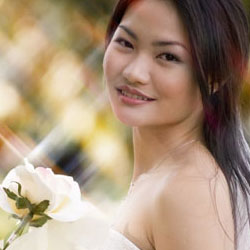
 Learn how to add a unique dreamy effect to your photos with this Star Diffusion Photoshop tutorial. This Photoshop effect creates diffusion in the shape of a four point star and is an ideal effect for portraits or any photos with a strong background blur.
Preview of Final Results
Star Diffusion Photoshop Tutorial
Step 1: Open a photo into Photoshop
Begin by opening a photo into Photoshop. To do this, choose File> Open, browse for the file, and click OK.
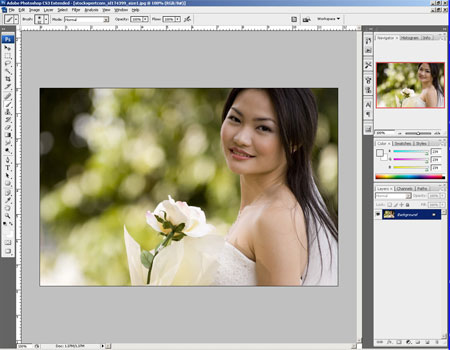
Step 2: Create a duplicate of the layer
Press Ctrl+J or choose Layer> Duplicate Layer to create a duplicate of the Background layer. You should now have a new layer. Double-click on the text of this layer and you will be able to edit the layer name. Name this layer Star Diffusion.
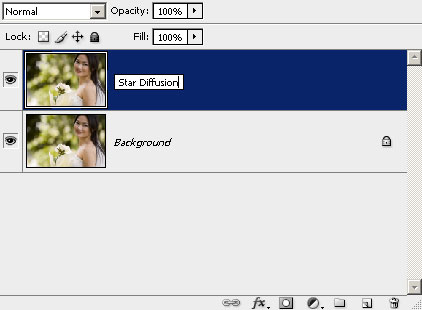
Step 3: Add a layer mask
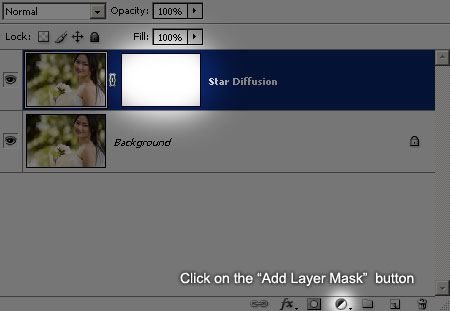
Add a layer mask to the Star Diffusion layer by clicking on the Add Layer Mask button in the Layers pallet or by choosing Layer> Layer Mask> Reveal All. You should now have a white thumbnail beside the layer mask.
Step 4: Create a copy of the image as a layer mask
After you change the layer name, the layer mask will be deselected. Before we continue, click on the layer mask thumbnail in the Layer pallet to activate it. It should have a white border around the thumbnail indicating that it has been selected. With the layer mask selected, choose Image> Apply Image. In the Apply Image tool, simply click OK to use the default settings. The layer mask should now have a copy of the image.
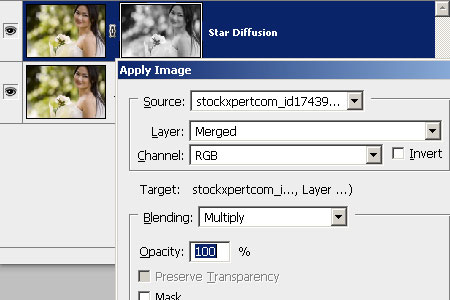
Step 5: Change the blending mode to Screen
In the Layers pallet, change the blending mode of the Star Diffusion layer to Screen.

Step 6: Duplicate the Star Diffusion layer and group the two layers
Make sure that the Star Diffusion layer is selected then press Ctrl+G or choose Layer> Group Layers. The layer group put the layer into a group to keep the layers organized. Double-click on the group name and rename this group to Star Diffusion. Now, select back the Star Diffusion layer and press Ctrl+J or choose Layer> Duplicate Layer to duplicate the layer.
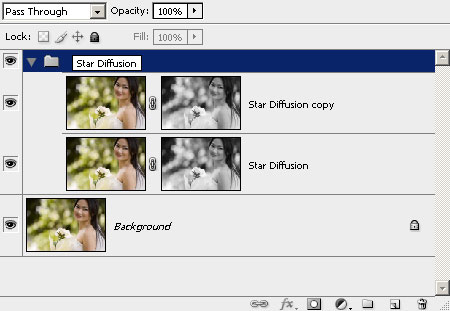
Step 7: Apply a diagonal motion blur
Select any one of the two Star Diffusion layer and choose Filter> Blur> Motion Blur. Set the Angle to -45º and adjust the distance according to the length of the streaks that you want. If you're working on a high 
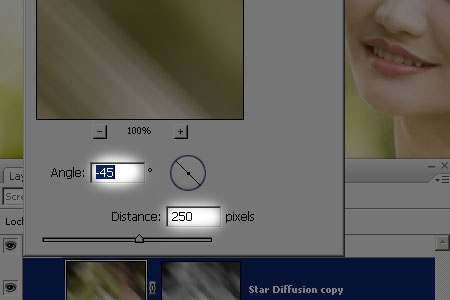
Step 8: Apply the opposite diagonal motion blur to the other Star Diffusion layer
Now select the other Star Diffusion layer that you did not apply the motion blur effect to. Choose Filter> Blur> Motion Blur and use the same distance settings as before but use the opposite angle setting by simply removing the - from the angle (ex. 45º instead of -45º). If you're working on a high resolution image and you had to repeat the filter in the previous step to get long streaks, don't forget to repeat the filter again so that this layer has the same streak length as the other Star Diffusion layer.
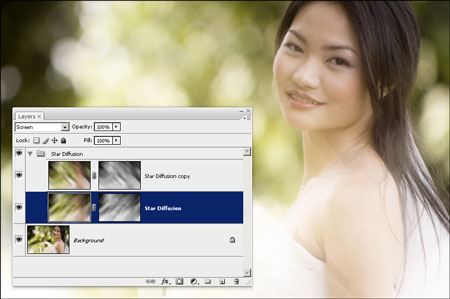
Step 9: Sharpen the Star Diffusion Layers
We now have a star diffusion effect, but it seems quite blurry and it's not every noticeable. To make it more visible, we'll use the Unsharp Mask filter to sharpen the layers. First, select any one of the two Star Diffusion layer and choose Filter> Sharpen> Unsharp Mask. In the Unsharp Mask tool, adjust the amount and radius settings to make the effect more visible.
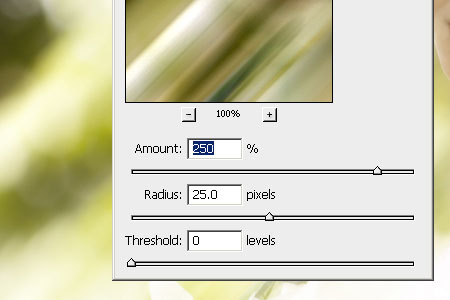
When done, click OK, and apply the filter again on the other Star Diffusion layer by selecting the layer and pressing Ctrl+F or choosing Filter> Unsharp Mask.
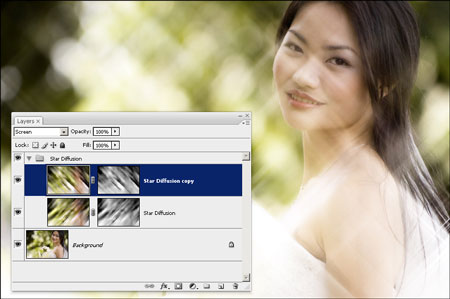
Step 10: Mask the effect out of the foreground
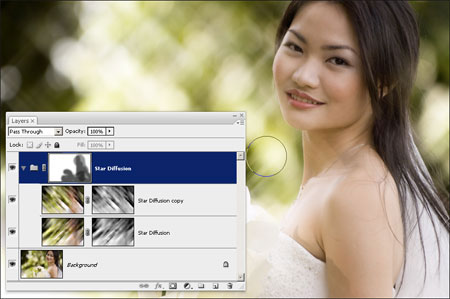
This star diffusion Photoshop effect can interfere with the subject in the photo by covering it. To correct this, we'll simply mask out the effect from the important areas in the photo. Begin by selecting the group in the Layers pallet and then clicking on the Add Layer Mask button in the Layers pallet or choosing Layer> Add Layer Mask> Reveal All. Once you have a layer mask, select the eraser tool and erase the areas that you would like to hide the diffusion effect from. Start with a soft and large round brush with a 50% opacity. The opacity of the brush can be changed from the option bar located near the top of the Photoshop window and the brush settings can be accessed by right-clicking anywhere in the document window.
Step 11: Alter the color of the Star Diffusion effect (optional)
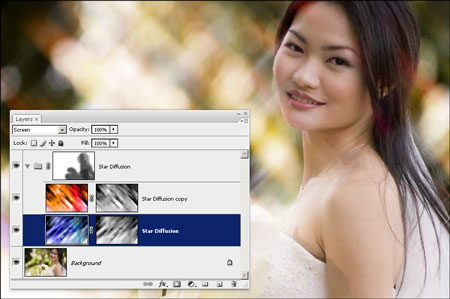
If you want to be more creative, you can alter the color of the star diffusion effect. For example, in the image below, the color of the two layers were changed to make the background bokeh look like it came from a city instead of a park. To alter the color of the effect, select the Star Diffusion layer and adjust the hue with the Hue/Saturation tool (Ctrl+U or Image> Adjustments> Hue/Saturation). Then, select the other Star Diffusion layer and use the Hue/Saturation tool again to change the color. You may also checkmark the Colorize option in the Hue/Saturation tool if you want to use a specific color for the entire layer.
Final Results
Original image
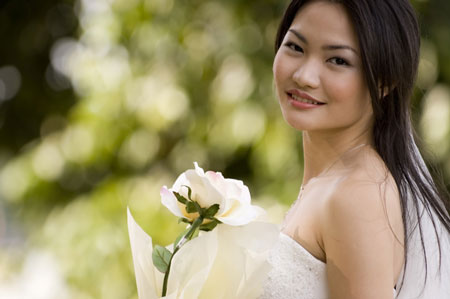
Star Diffusion Photoshop tutorial
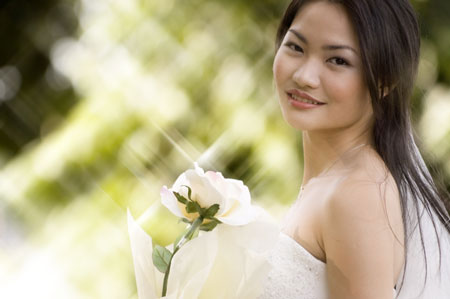
Star Diffusion (Different Variation)
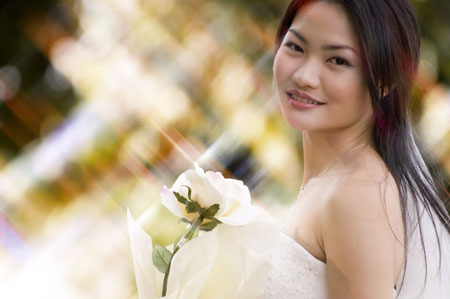


 :D
:D
 :)
:)
 ;;)
;;)
 :x
:x
 :$
:$
 x(
x(
 :@
:@
 :~
:~
 :|
:|
 :))
:))
 :(
:(
 :s
:s
 :((
:((
 :o
:o


No comments: