

Instead of riding snow, this boarder is flying through flames. In this tutorial, we’ll create fire and smoke without using any photos. You’ll learn how to combine both to create a flaming, dynamic image that jumps right at you.
The Photo
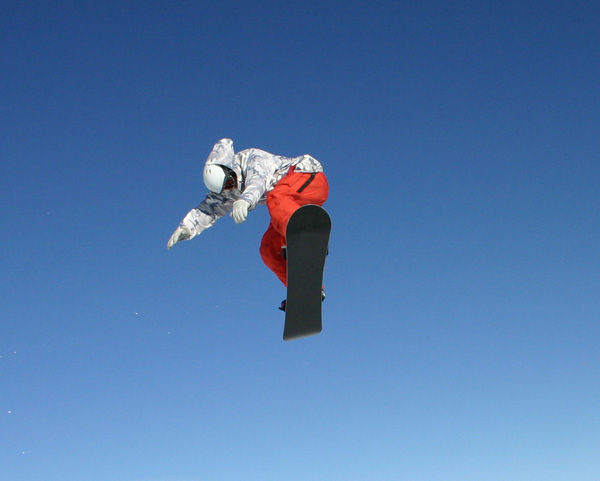
First, we need an image to work with. I chose an image of a snowboarder jumping from Stock.xchang, it’s great because he’s quite isolated against a straight blue background, which will make cutting him out much easier.
Step 1
Let’s start off with a subtle gradient. Create a Radial Gradient ( Layer > New Fill Layer > Gradient) with a black outside and a dark grey inside.
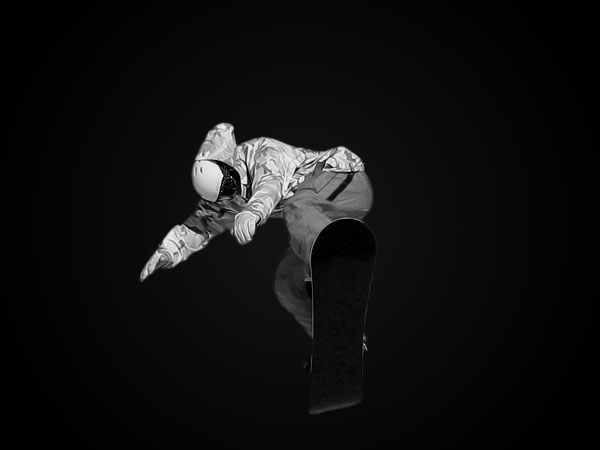
Next, import the image you wish to edit on a new layer. Scale it, place it, and cut it out. If you choose a snowboarder against a blue sky like me, it’s easy to cut using color range ( Select > Color Range…) or the Magic Wand tool. I desaturated ( Image > Adjustments > Desaturate) the image because I only want the flames to be colored. This will give a punchier effect.
Step 2
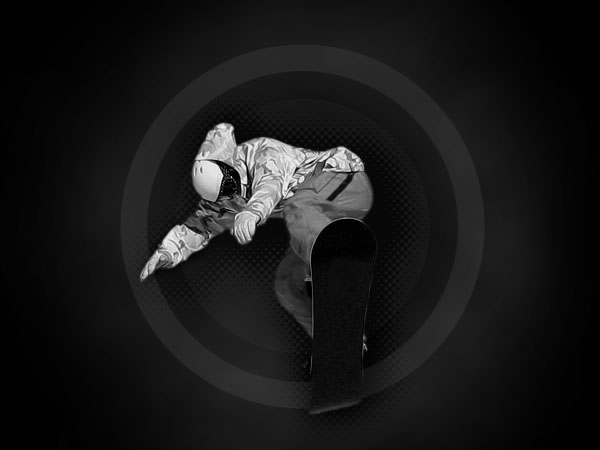
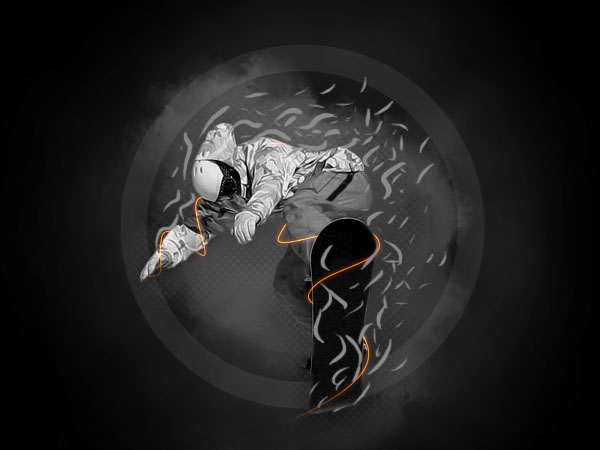
Now we’ll create the background and the smoke. Create a new layer under the snowboarder and use the clouds filter on it ( Filter > Render > Render Clouds. Make sure you have white and black as front and back color). Erase over the outside and over the place where snowboarder sits and then set the Opacity to 18%.
On a new layer, use the Elliptical Marquee Tool (M) to create three circles and fill them with different shades of grey (start with the biggest one). You can also duplicate the layer, resize the circle (with Shift+Alt selected) and fill it with another shade. Change the opacity to make the circles less visible.
I also used a halftone effect behind the snowboarder. It doesn’t add much, but if you like this detail check out Sean’s Halftone Tutorial on how to achieve it.
Step 3
To create more smoke, I copied the snowboarder to a new layer and used the Smudge Tool (R) on it. Change the settings to what you see below and just move your mouse around to create a smoke-like effect. I set this layer’s opacity to 40%. It’s located beneath the boarder but above the other background layers.
Smudge settings:
Spacing: 10%
(In Shape Dynamics:)
Size Jitter: 46%
Minimum Diameter: 64%
Angle Jitter: 30%
Roundness Jitter: 0%
(In Scattering:)
Scatter: 43%
Count: 1
Count Jitter: 86%
(In Other Dynamics:)
Strength Jitter: 100%
Step 4
This has been discussed in other tutorials, but in case you haven’t seen it explained yet, don’t skip this step.
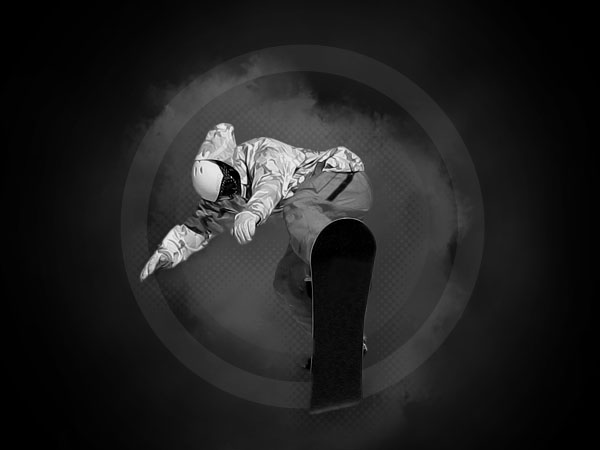
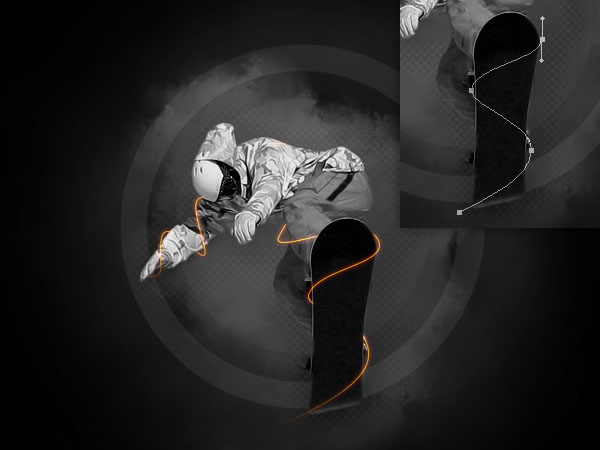
Take out the Pen Tool (P) and create a path around the snowboard and the right arm. When you’re finished, right-click the path and choose Stroke Path (Set your brush to the right size first. In my case, a 1px hard brush.), you can use Simulate Pressure if you like.
Delete the vector path (Right click > Delete Path) and erase the parts you don’t need (behind the board/arm) on the newly created line. In the Blending Options for this layer, I chose an orange Color Overlay and red Outer Glow set to Linear Dodge.
Step 5
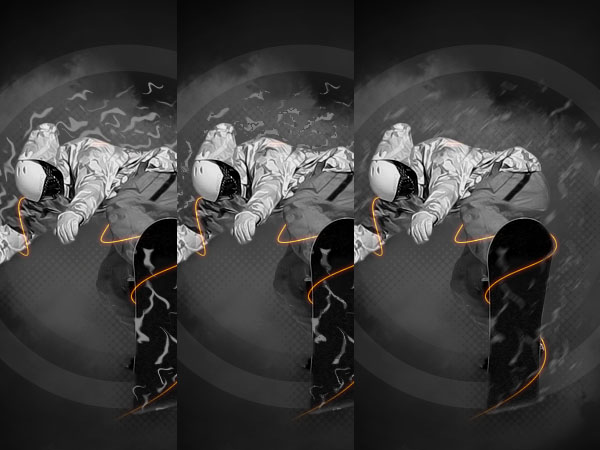
Now we’ll create the hardest part: the flames. Create a new layer and choose a 5px hard brush.(I chose a shade of grey because I wanted to add real color to it later. You can start with that already by choosing an orange color for this step, if you like). I used my Wacom to create some random flame-like strokes. If you’re using a mouse, you can right-click anywhere on the canvas to change your brush size easily. Try varying them and make them go in one direction. I’m making most go from bottom left to upper right.
Step 6
Next, I used three filters on those flames to make them appear more realistic. I started with the ripple filter ( Filter > Distort > Ripple) at 100%. Next, I used ocean ripple ( Filter > Distort > Ocean Ripple) with default settings, this will not change the shapes but it will create some darker and lighter tones in the flames. I faded that filter ( Edit > Fade Ocean Ripple) to 40%. The last filter is a motion blur ( Filter > Blur > Motion Blur), set the angle right (45° here), and choose a low value. I changed the Opacity of the layer to 66%.
Step 7
To create even more flames, I duplicated that layer and used wave ( Filter > Distort > Wave) on it with the default values. I set the layer to orange in the preview so it would be clear what kind of outcome you can expect. I also lowered the Opacity to 66% and erased some parts that didn’t look good.
Step 8
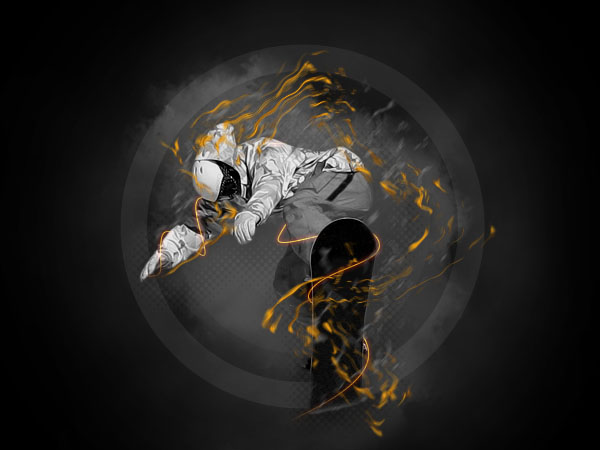
To bring out the flames more, I applied the image on a new layer ( Image > Apply Image) and gave that layer an Unsharp Mask ( Filter > Sharpen > Unsharp Mask). Then I created a grey to orange Gradient Map ( Layer > New Adjustment Layer > Gradient Map) to give the border an orange tint.
The flames are still in need of color. Ctrl+Shift+Click on all the thumbnails next to the flame layers so you have a selection of the flames. Fill this selection, in a new layer, with orange and set it to Color with an Opacity of 80%.
Conclusion
As finishing touch, we need some more light and color. Add a new layer and use apply image ( Image > Apply Image). In the lighting effects ( Filter > Render > Lighting Effects) options, add more lights to the scene (drag the light bulb icon onto the small preview). Erase the part of the snowboarder because it might get overlighted. You can set this layer to Lighten. The smoke might not be visible enough now, so if needed you can copy one of the layers and set it on top with a low opacity and erase over the main parts.
Creating realistic fire isn’t easy and might not work out for the first time. But after some tries you might even end up with something better than me. If you wish to make it even more realistic, you can try to focus on the colors of the flames and give them a yellow inside and a red outside.
In any case, hope you enjoyed the tutorial. Along with the flames, the main point here is to see how a little Photoshop adornment when combined with a photo can make a really punchy graphic, especially when you contrast the black and white areas with some strong color.


 :f
:f
 :D
:D
 :)
:)
 ;;)
;;)
 :x
:x
 :$
:$
 x(
x(
 :?
:?
 :@
:@
 :~
:~
 :|
:|
 :))
:))
 :(
:(
 :s
:s
 :((
:((
 :o
:o


No comments: